Guide to event bookings on the APA website
This page outlines how to register yourself and others for an event on the APA website, and explains how to go about managing group bookings.
Registration options for yourself or others
Visit the event page, and if you haven’t already logged in you can do so at the bottom of the page. If you need to create an account, you can also do this here with more information in this user guide.
Once you’ve logged in you’ll have the option to register yourself, or someone else:
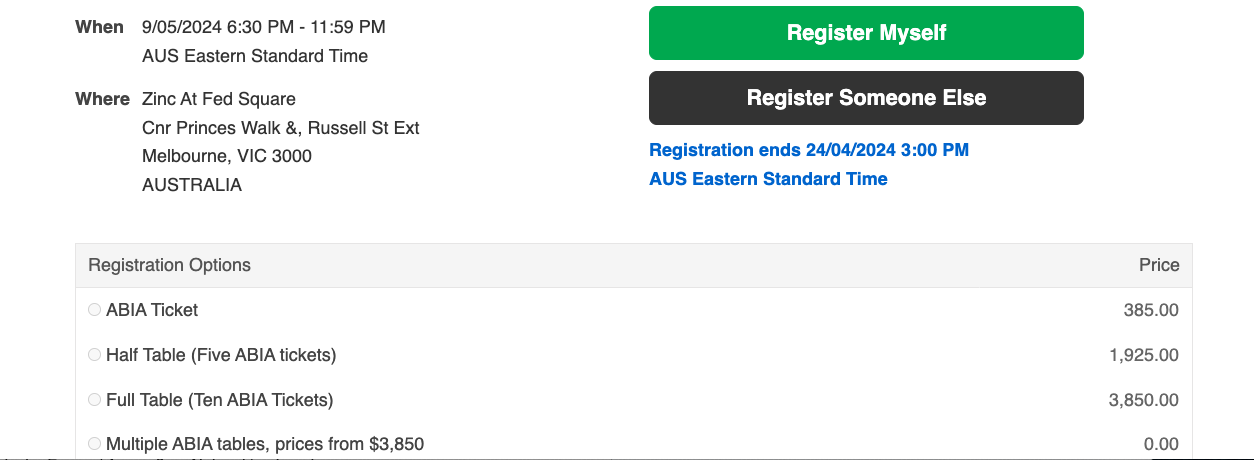
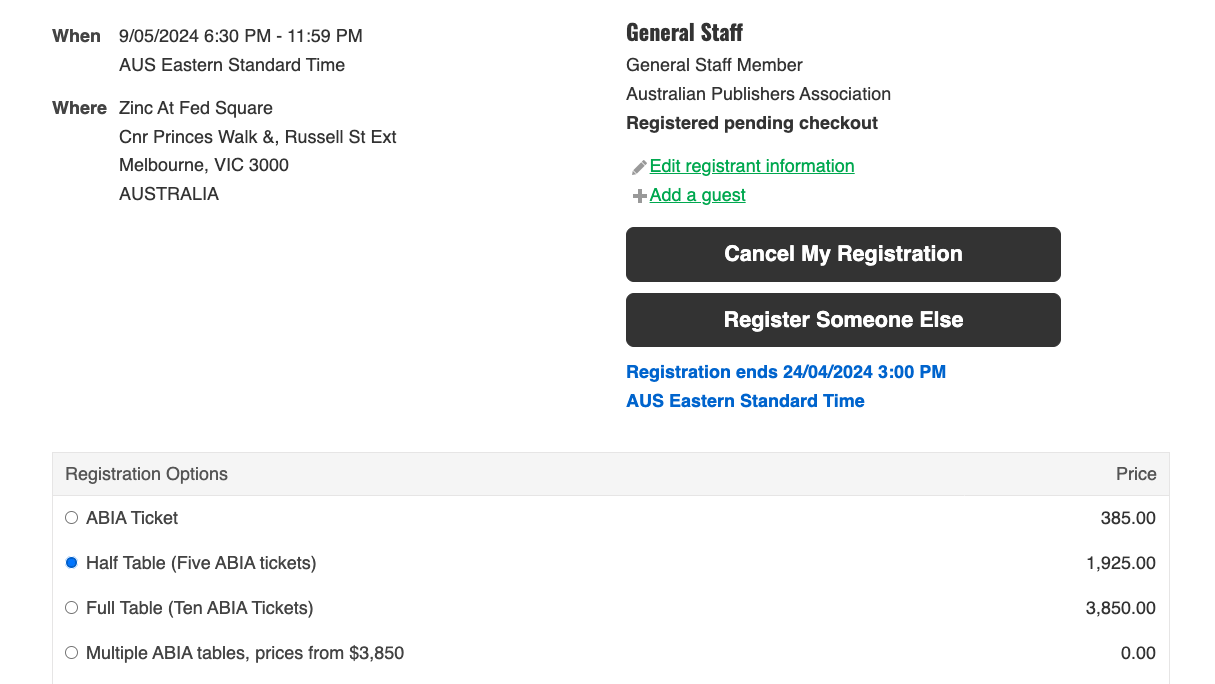
Select either Register Myself, or Register Someone Else, and then select the appropriate Registration Option:
Please note: if you register a group booking for someone else then they will have to login to manage the allocation of seats, as the booking will appear in their account rather than yours.
If you’re registering a few tickets, you can register multiple people at once – just select Register Someone Else and use the lookup to find the colleague you want to register. 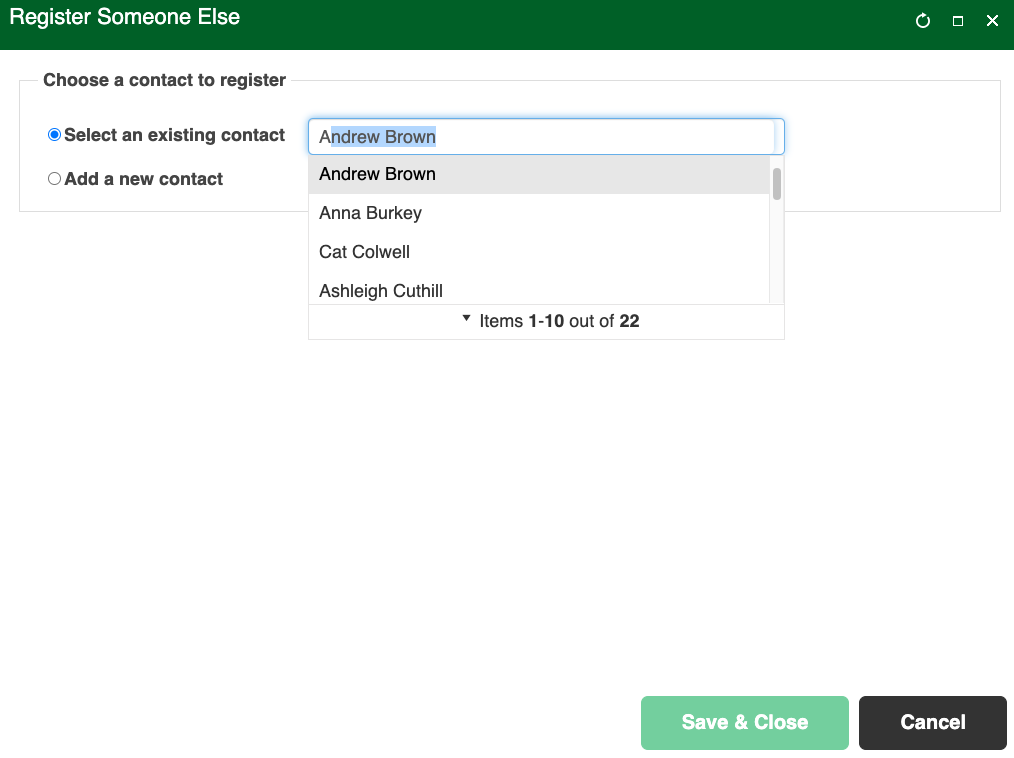
Please note: if your colleagues aren’t appearing, see details here on updating organisation contact lists as a Company Admin or get in touch with us. If you want to add a guest and you're only registering individual tickets, use the Add a Guest option.
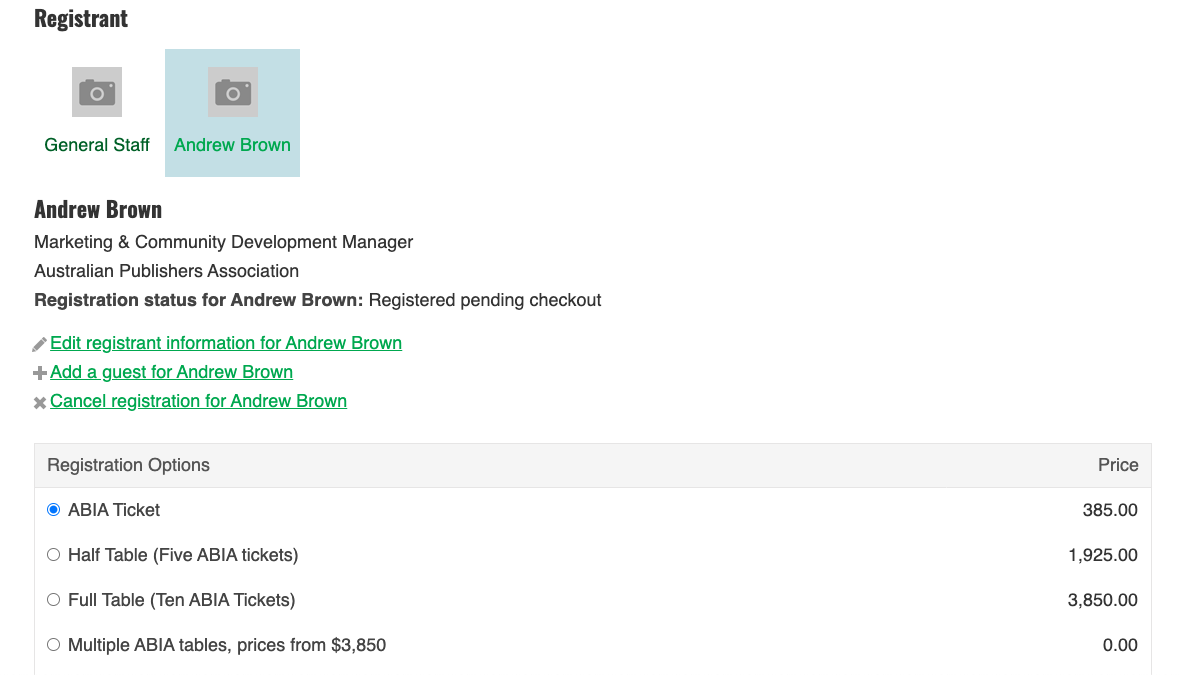
Once the person is selected, choose the relevant registration option for each person:
Complete any event questions, and then hit the Save button, and then the Proceed to Checkout button:

On the checkout page, you can pay by Credit Card or Pay by Invoice (only available to some members).
Once you complete the checkout, you’ll receive your order confirmation (also sent by email).
If you’ve selected a group or table booking option you’ll also receive a notification to manage your group booking.
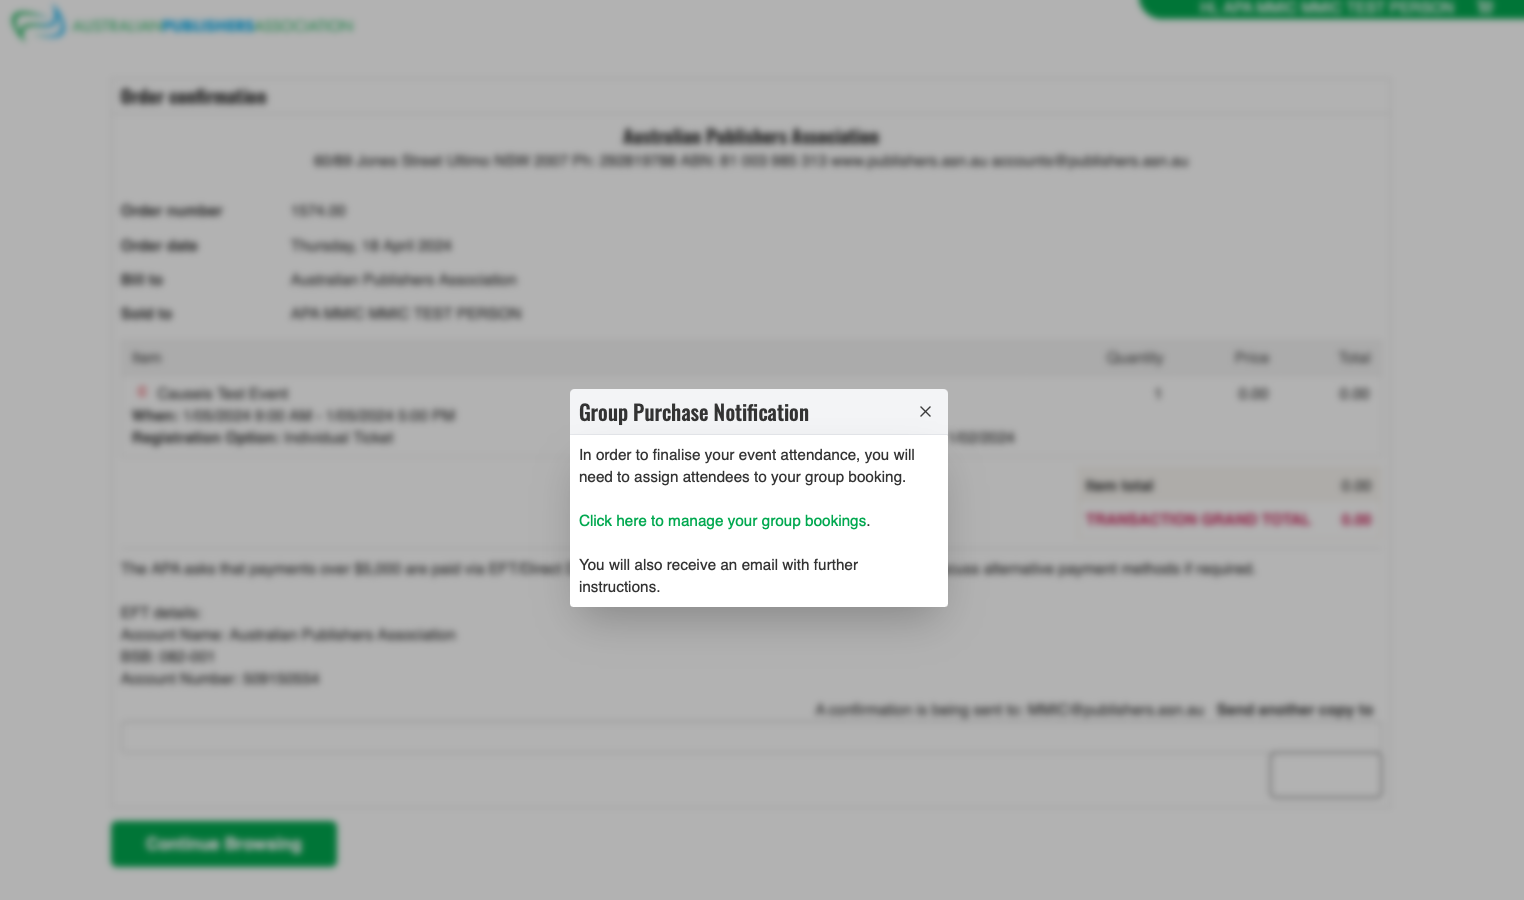
Click on the link to be taken to your Group Bookings page where you can add attendees.
Managing Group Bookings
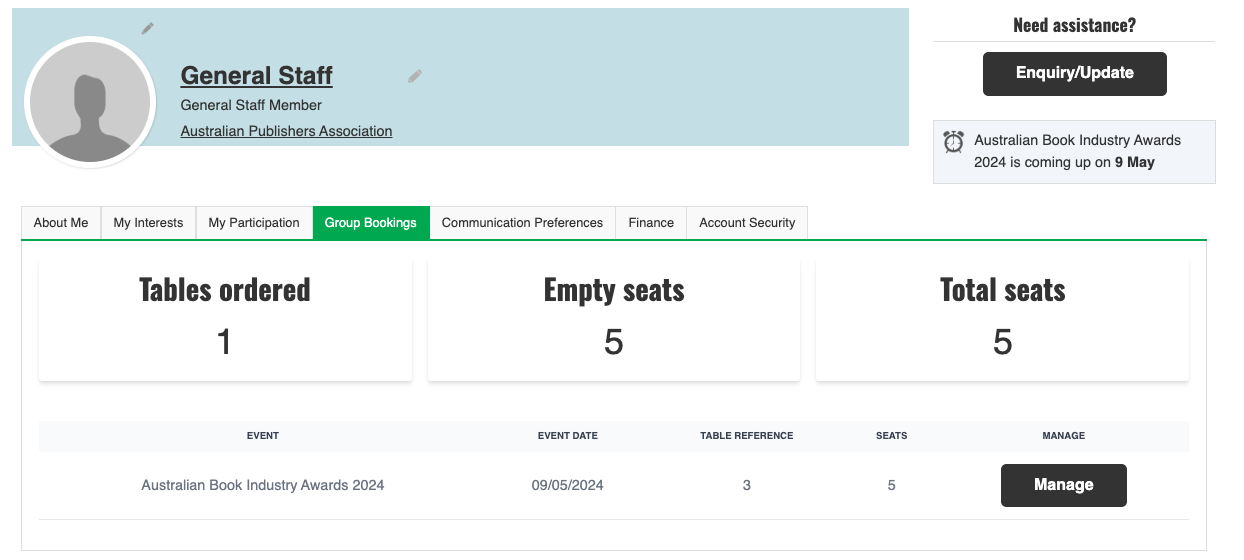
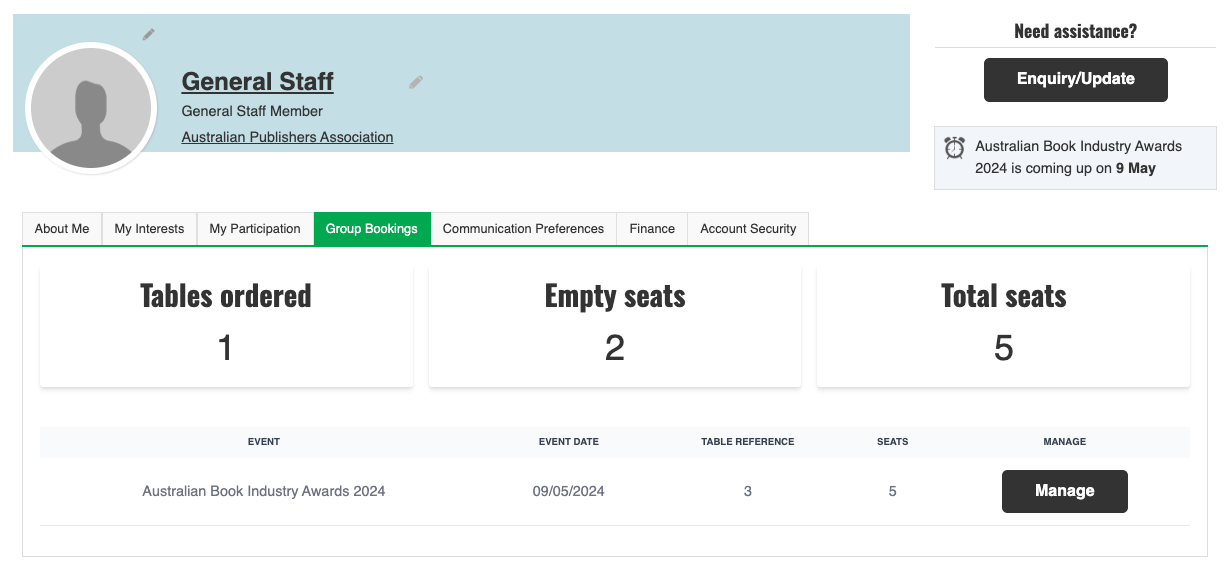
When you visit the ‘Group Bookings’ tab on your profile page, you can see a list of your group bookings, and each of the tables you have ordered – including details of how many seats you need to fill in the details for:
Please note: not all events will offer table seating, but all group bookings will refer to tables.
Click on the Manage button to be taken to the relevant booking, and then hit the edit icon under ‘Seat Details’ to assign the seat to someone.
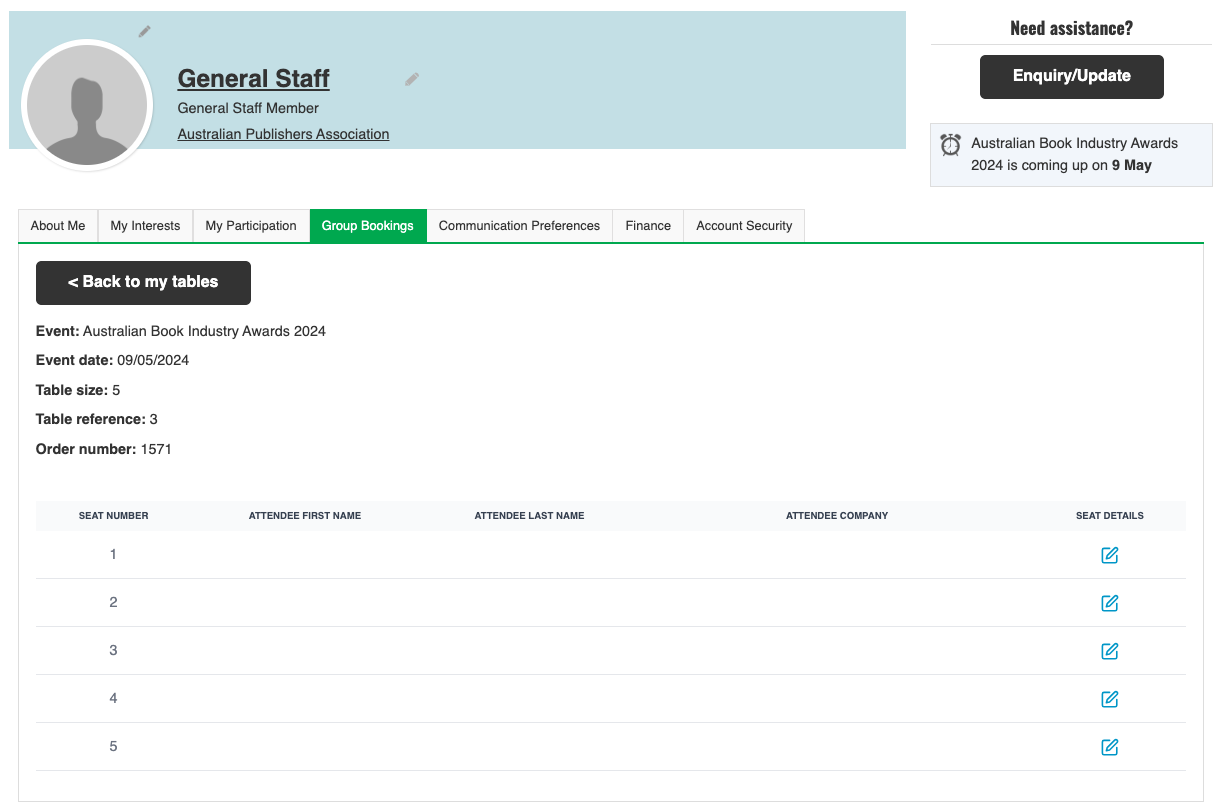
You can use the ‘Attendee Lookup’ to search for a colleague at your organisation and it will complete their details, or if they aren’t found (for instance if they are a guest such as an author) you can complete their details:
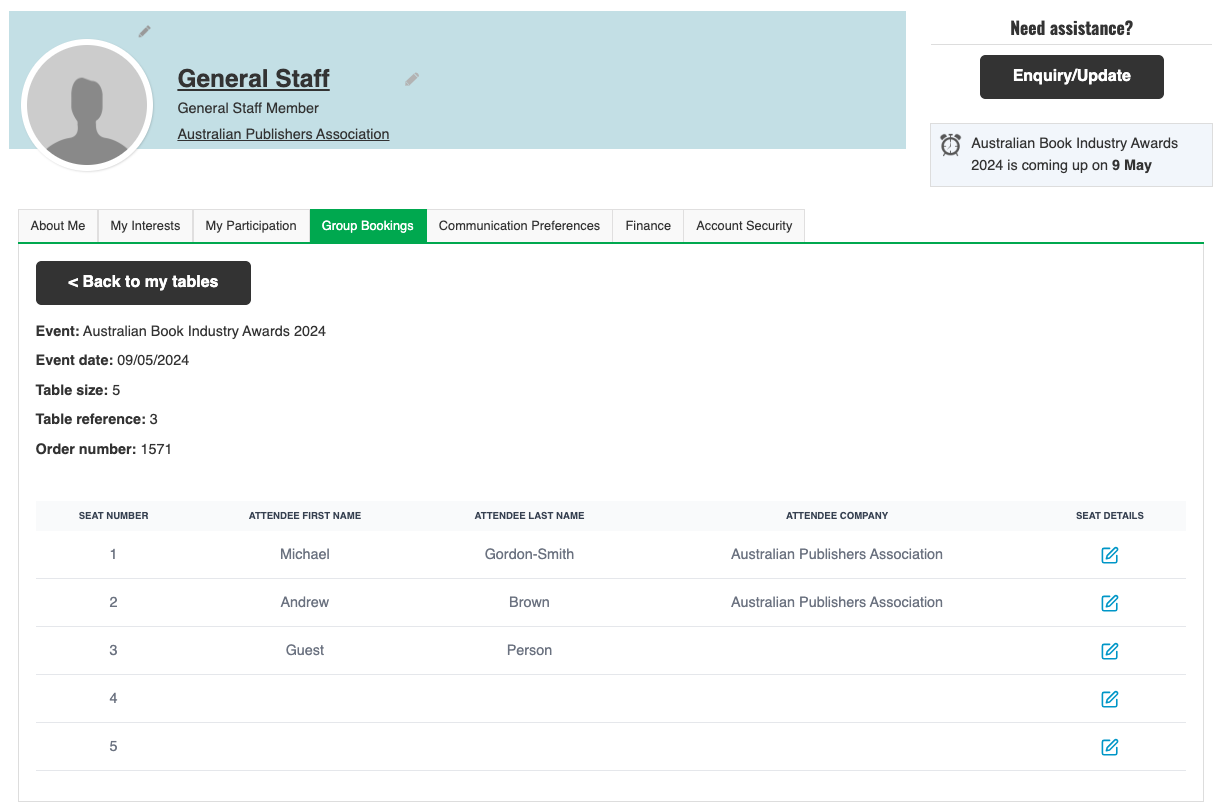
Hit save, and repeat this process to fill in the details for all your seats for this table, and then for each of your tables:
When you now visit your Group Bookings page, you’ll see the number of empty places you have remaining on your group bookings:
Check the event page to see when the deadline is for assigning your tickets and adding dietary requirements, as the ability to update these details is typically locked 7-10 days out from the event.
Managing invoices and payments
Find further information on managing your organisation's account, finances, and staff lists here, while for details on managing your personal account, see the general user guide here.